

The car cooling system is a crucial component that ensures your engine operates efficiently and avoids overheating. Regular maintenance of this system not only enhances performance but also extends the lifespan of your vehicle. One of the key elements in maintaining the cooling system is the use of the right coolant. Understanding its role can significantly affect your car’s functionality.
Coolant serves to lower the freezing point and raise the boiling point of the liquid within the cooling system. This allows the engine to maintain optimal temperatures under various driving conditions. Therefore, it’s essential to regularly check the coolant levels and its condition. A worn-out or contaminated coolant can lead to overheating, corrosion of internal components, and ultimately, expensive repairs.
Besides checking the coolant, it’s important to inspect other components of the cooling system, such as the radiator, hoses, and water pump. Regular checks and timely replacements of damaged parts will contribute to the overall health of your vehicle. In this article, we will explore the best practices for maintaining your car’s cooling system, ensuring that it remains efficient and reliable throughout its lifespan.
Monitoring Coolant Levels and Quality
Regularly checking your car’s coolant levels is essential for preventing overheating and ensuring optimal performance. Begin by locating the coolant reservoir; it is usually a translucent tank near the radiator. The reservoir often has markings indicating the minimum and maximum levels. Always check the coolant level when the engine is cold to avoid burns and injuries.
When inspecting the coolant, look for clarity and color. Coolant should be a bright, vibrant color (commonly green, orange, or pink) and free from debris. If it appears murky or has rusty particles, it may indicate contamination or degradation. In such cases, change the coolant to maintain the system’s efficiency.
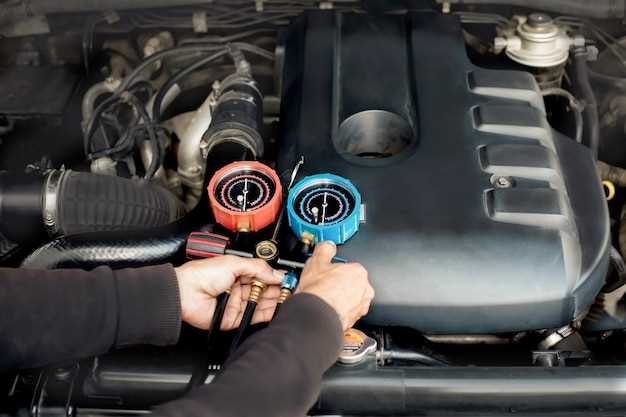
Another vital aspect to consider is the coolant’s pH balance. Over time, coolant can become acidic, which may lead to corrosion and damage to engine components. Testing strips are available for measuring coolant pH; if it’s outside the recommended range, a flush and replacement of the coolant is necessary to prevent overheating and faults.
Lastly, keep an eye on the scheduled maintenance intervals for coolant replacement, usually every 30,000 to 60,000 miles, depending on your vehicle’s specifications. Timely monitoring and maintenance of coolant levels and quality help protect your engine from overheating and prolong its lifespan.
Identifying Signs of Overheating in Your Vehicle
Recognizing overheating in your vehicle is crucial for maintaining its health and preventing severe damage. There are several key indicators you should monitor closely.
One of the first signs of overheating is the temperature gauge on your dashboard. If the needle moves into the red zone, this is a strong warning that your engine is reaching unsafe temperatures. Additionally, you may notice the warning light for the engine temperature illuminating, signaling the need for immediate attention.
Another common symptom is steam or smoke rising from under the hood. This is typically a result of coolant boiling over, which occurs when the engine’s temperature exceeds normal operating limits. If you observe steam, safely pull over and turn off your engine to prevent further damage.
Strange odors can also indicate overheating. A sweet, burning smell may suggest that coolant is leaking or has mixed with oil. This can signal an internal engine issue that should not be ignored.
Additionally, you may experience a loss of power during acceleration. If your vehicle struggles to gain speed or feels sluggish, it may be due to the engine automatically reducing power to protect itself from overheating.
Lastly, frequent engine knock or pinging sounds can be a result of overheating. These noises indicate that the fuel is igniting too early in the cycle, commonly associated with high temperatures within the engine.
By promptly identifying these signs, you can take proactive measures to address the issue and maintain your vehicle’s cooling system effectively.
Steps for Flushing and Refilling Your Cooling System
To maintain your vehicle’s cooling system and prevent overheating, it is essential to flush and refill it periodically. Here are the steps to follow for an effective cooling system maintenance.
1. Gather Necessary Tools and Materials: Before starting, collect all required supplies, including a radiator flush solution, a large container for old coolant, a funnel, and a hose. Ensure you have safety gear such as gloves and goggles.
2. Allow Engine to Cool: Never attempt to flush the cooling system when the engine is hot. Wait until the engine is cool to avoid burns or injuries when handling coolant and radiator components.
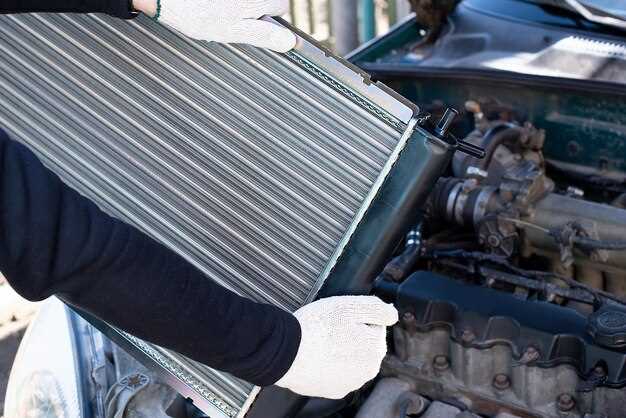
3. Locate the Radiator Drain Valve: Identify the drain valve at the bottom of the radiator. Place the container underneath to catch the old coolant. Open the valve and allow the old coolant to drain completely.
4. Add Radiator Flush Solution: After draining, close the drain valve and mix the radiator flush solution with water according to the product instructions. Pour this mixture into the radiator using a funnel.
5. Run the Engine: Start the engine and let it idle for about 10-15 minutes with the heater turned on. This will circulate the flushing solution through the cooling system and help break down deposits and contaminants.
6. Drain the System Again: Once the flushing process is complete, turn off the engine and let it cool. Afterward, drain the system again to remove the flushing solution.
7. Rinse the Radiator: To ensure all debris and flush chemicals are removed, fill the radiator with clean water, run the engine for a few minutes, and drain it again. Repeat this step if necessary until the water runs clear.
8. Refill with New Coolant: Close the drain valve and refill the cooling system with the appropriate mixture of coolant and water. Refer to the manufacturer’s guidelines for the correct type and ratio of coolant.
9. Check for Leaks: After refilling, inspect all hoses and connections to ensure there are no leaks. Start the engine and monitor the coolant level, adding more if necessary.
10. Dispose of Old Coolant Responsibly: Take the used coolant to a recycling center or an auto shop that accepts hazardous waste. Do not pour it down the drain or dispose of it inappropriately.
Following these steps will help keep your car’s cooling system functional and efficient, minimizing the risk of overheating.


