

Over time, headlights can become dull and yellowed due to exposure to UV rays, dirt, and other environmental factors. This deterioration not only affects the aesthetic appeal of your vehicle but also compromises safety by reducing visibility when driving at night or in poor weather conditions. Fortunately, headlight restoration is a straightforward DIY project that can make a significant difference in your headlights’ clarity and effectiveness.
This guide will walk you through the essential steps for restoring your headlights on your own, saving you the cost of professional services while enhancing the look and performance of your vehicle. With the right tools and cleaning techniques, you can revive your headlights to their original shine, ensuring safer driving conditions and a more appealing car appearance.
We will cover everything from the materials needed for the project to an easy-to-follow step-by-step process. Whether you’re a seasoned car enthusiast or just looking to maintain your vehicle, this comprehensive guide will provide you with the knowledge and confidence to tackle headlight restoration effectively. Join us as we dive into the best practices for cleaning and rejuvenating your headlights.
Identifying the Causes of Cloudy Headlights
Cloudy headlights can significantly impair visibility while driving, posing a safety risk. Understanding the primary causes of this issue is crucial for effective cleaning and restoration. One common cause is oxidation, which occurs when the plastic lens of the headlight is exposed to UV rays from sunlight over time. This exposure leads to a dull, yellowish film on the surface, diminishing the clarity of the light emitted.
Another factor contributing to cloudy headlights is environmental contaminants. Dust, dirt, and road debris can accumulate on the headlights, creating a layer that obstructs light output. Additionally, moisture infiltration can lead to cloudiness. When water seeps into the headlight assembly, it can result in fogging or condensation within the lens, further reducing clarity.
Improper cleaning techniques can also exacerbate the problem. Using abrasive materials or harsh chemicals may scratch the lens, making it more susceptible to future clouding. Regular maintenance, including appropriate cleaning methods, is essential to preserve the integrity of headlights and ensure optimal visibility.
By recognizing these causes, vehicle owners can take proactive steps to clean and restore their headlights effectively, enhancing safety while driving at night or in adverse weather conditions.
Step-by-Step Cleaning Process for Clear Headlights

Restoring the clarity of your headlights is crucial for safety and improved visibility at night. Follow this step-by-step cleaning process to eliminate the cloudy appearance and bring back shine.
Step 1: Gather Your Supplies
You will need the following items: headlight restoration kit, sandpaper (grits ranging from 400 to 2000), microfiber cloths, tape, water, and a spray bottle. Ensure that the car is parked in a shaded area to avoid excessive heat exposure during the cleaning process.
Step 2: Prepare the Area
Start by cleaning the headlight surface with soap and water to remove dirt and debris. Dry it thoroughly with a microfiber cloth. Next, use masking tape to protect the paint surrounding the headlight. This prevents damage while you work.
Step 3: Sanding the Headlights
Begin with coarse sandpaper (400 grit) to remove the top layer of oxidation. Wet the sandpaper and headlight simultaneously. Using even pressure, sand the surface in a left-right motion, followed by an up-down motion. Rinse frequently and dry with a cloth to check the progress.
Once the cloudy layer is gone, switch to finer sandpaper (800 grit), repeating the process to smooth the surface further. Finally, use 2000 grit to achieve a polished finish. Rinse the headlight thoroughly after sanding each grit.
Step 4: Apply the Restorer
Using a restoration product from your kit, apply it according to the instructions. Typically, this involves applying it to the headlight with an applicator pad in a circular motion. Let it sit for the recommended time for optimal results.
Step 5: Buff and Polish
Once the restorer has dried, take a clean microfiber cloth and buff the headlight surface. This step enhances clarity and adds a protective layer. Work until achieving a crystal-clear finish, and inspect for any remaining cloudiness.
Step 6: Final Steps
Remove the masking tape carefully to avoid pulling away any paint. Clean any residue from the surrounding area and perform a final inspection on the headlights. If necessary, repeat the process for a clearer outcome.
The result should be a well-restored headlight that enhances visibility during nighttime driving, ensuring safety and improved aesthetics for your vehicle.
Preventing Future Cloudiness on Headlight Surfaces
To maintain clear headlights and prevent future cloudiness, regular maintenance is essential. Start by periodically cleaning the headlight surfaces using a mild soap and water solution. This will help remove dirt and grime that can contribute to cloudiness over time.
Another effective method is to apply a UV protectant specifically designed for headlights. These products create a protective barrier against harmful UV rays, which can degrade the polycarbonate material of headlights and lead to a cloudy appearance.
Avoid using abrasive cleaners or materials that can scratch the surface of the headlights. Instead, opt for soft microfiber cloths when cleaning to ensure that you do not inadvertently damage the lens.
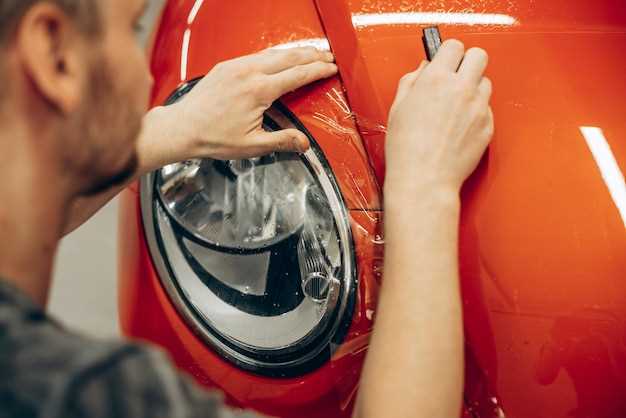
Consider using headlight covers or film as an additional protective measure. These films can shield the headlights from environmental factors, such as road debris and harsh weather, extending their clarity and lifespan.
Lastly, whenever you notice any signs of cloudiness, address them promptly. Early intervention can prevent the issue from worsening and maintain the overall effectiveness and aesthetic of your headlights.


